Material Culture Monday: Lessons From Five Months of Learning to Make Maps
TLDR: It's been a great new hobby

In November 2024, I took a hand-drawn map-making class at North House Folk School in Grand Marais, Minnesota. The teacher, Bryan Hansel, emphasized that drawing maps is not about accuracy; it’s a visual method of story-telling that maps your relationship to place and space.
For me, thinking about how I want to add text and layer my own stories about a place with the larger history of the place is one of the reasons I’m drawn to mapmaking as a form of storytelling.
My first handmade map that I created at North House in November.
An Overview of the Process
Over the past few months, I’ve been experimenting with making my own maps. I’ve been applying the techniques I learned and experimenting with some new ideas. Here’s the general method I’ve been using:
First, choose a place you want to map. Then, find a map of the place online (you can use Google Maps, Google Earth, or free GIS maps that are available) and print it.
Then, place the printed map on a lightbox and place a piece of tracing paper on top of it. Using the lightbox, trace the map onto the tracing paper in pencil. Add labels on the map. One option is to add another piece of tracing paper on top of the original piece and write your labels on that. That way, if you make a mistake, you won't affect the base map you traced.
Outlining in ink on a lightbox.
Once you have your map outline, labels, and visuals compiled onto one piece of paper, I like to photocopy that piece of paper. This creates a hard copy in darker ink without requiring re-tracing from pencil to black ink.
I then used a lightbox, this printed version of the map, and a piece of watercolor paper to create the final map.
After tracing the outline, you can add color and labels. The order I do this in depends on the map I’ve created and my goal for the final product. However, I alternate between labeling and coloring to create the final map. I like using watercolor pencils for color and fine-tipped pens for labeling. I’ve also experimented with using some watercolor markers for coloring.
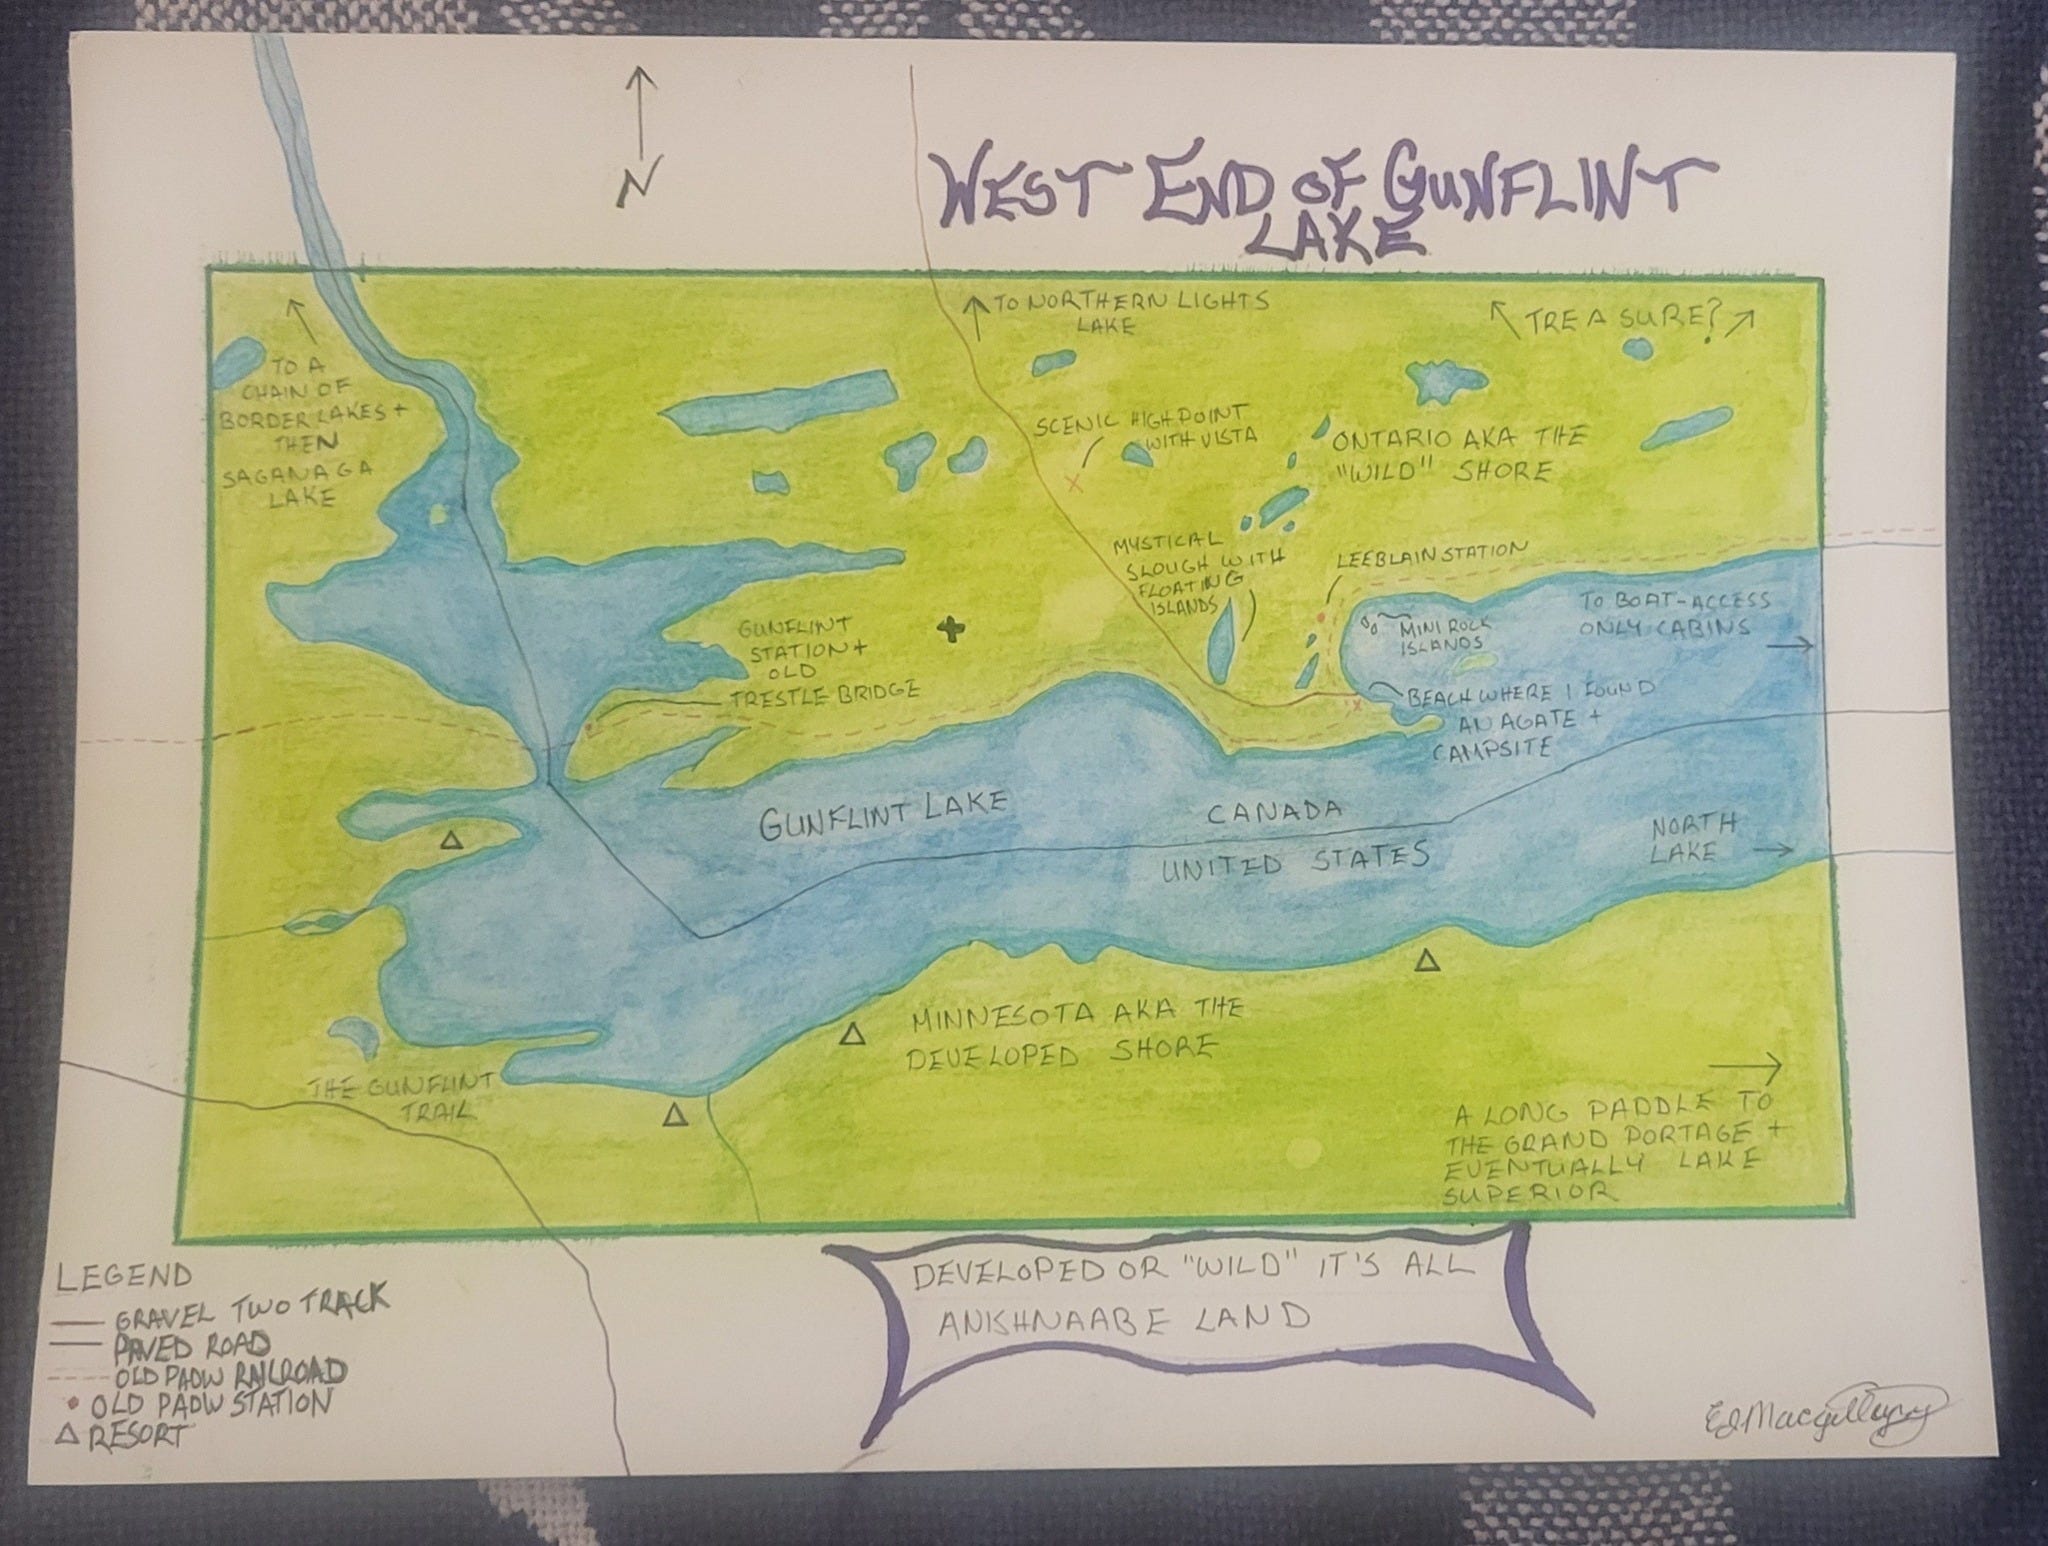
Coloring in a map of the Gunflint Lake region before adding labels.
I plan to write a more detailed post about the process in the future, so let me know if you have specific questions!
The Lessons
Here are five lessons I’ve learned over the past 5 months!
1. Focus on the moment
There is a lot of talk about developing mindfulness these days. Being in the moment is hard when we are constantly bombarded with worries about work, life, and potential catastrophes. Let’s be real: it’s a stressful time to be alive. Sitting down and tracing a map and thinking about how best to label it requires me to tune out other thoughts and focus on what’s in front of me. I’ve been happily surprised about how it has helped me quiet my mind. I think it’s another reason why I feel better after working on a map.
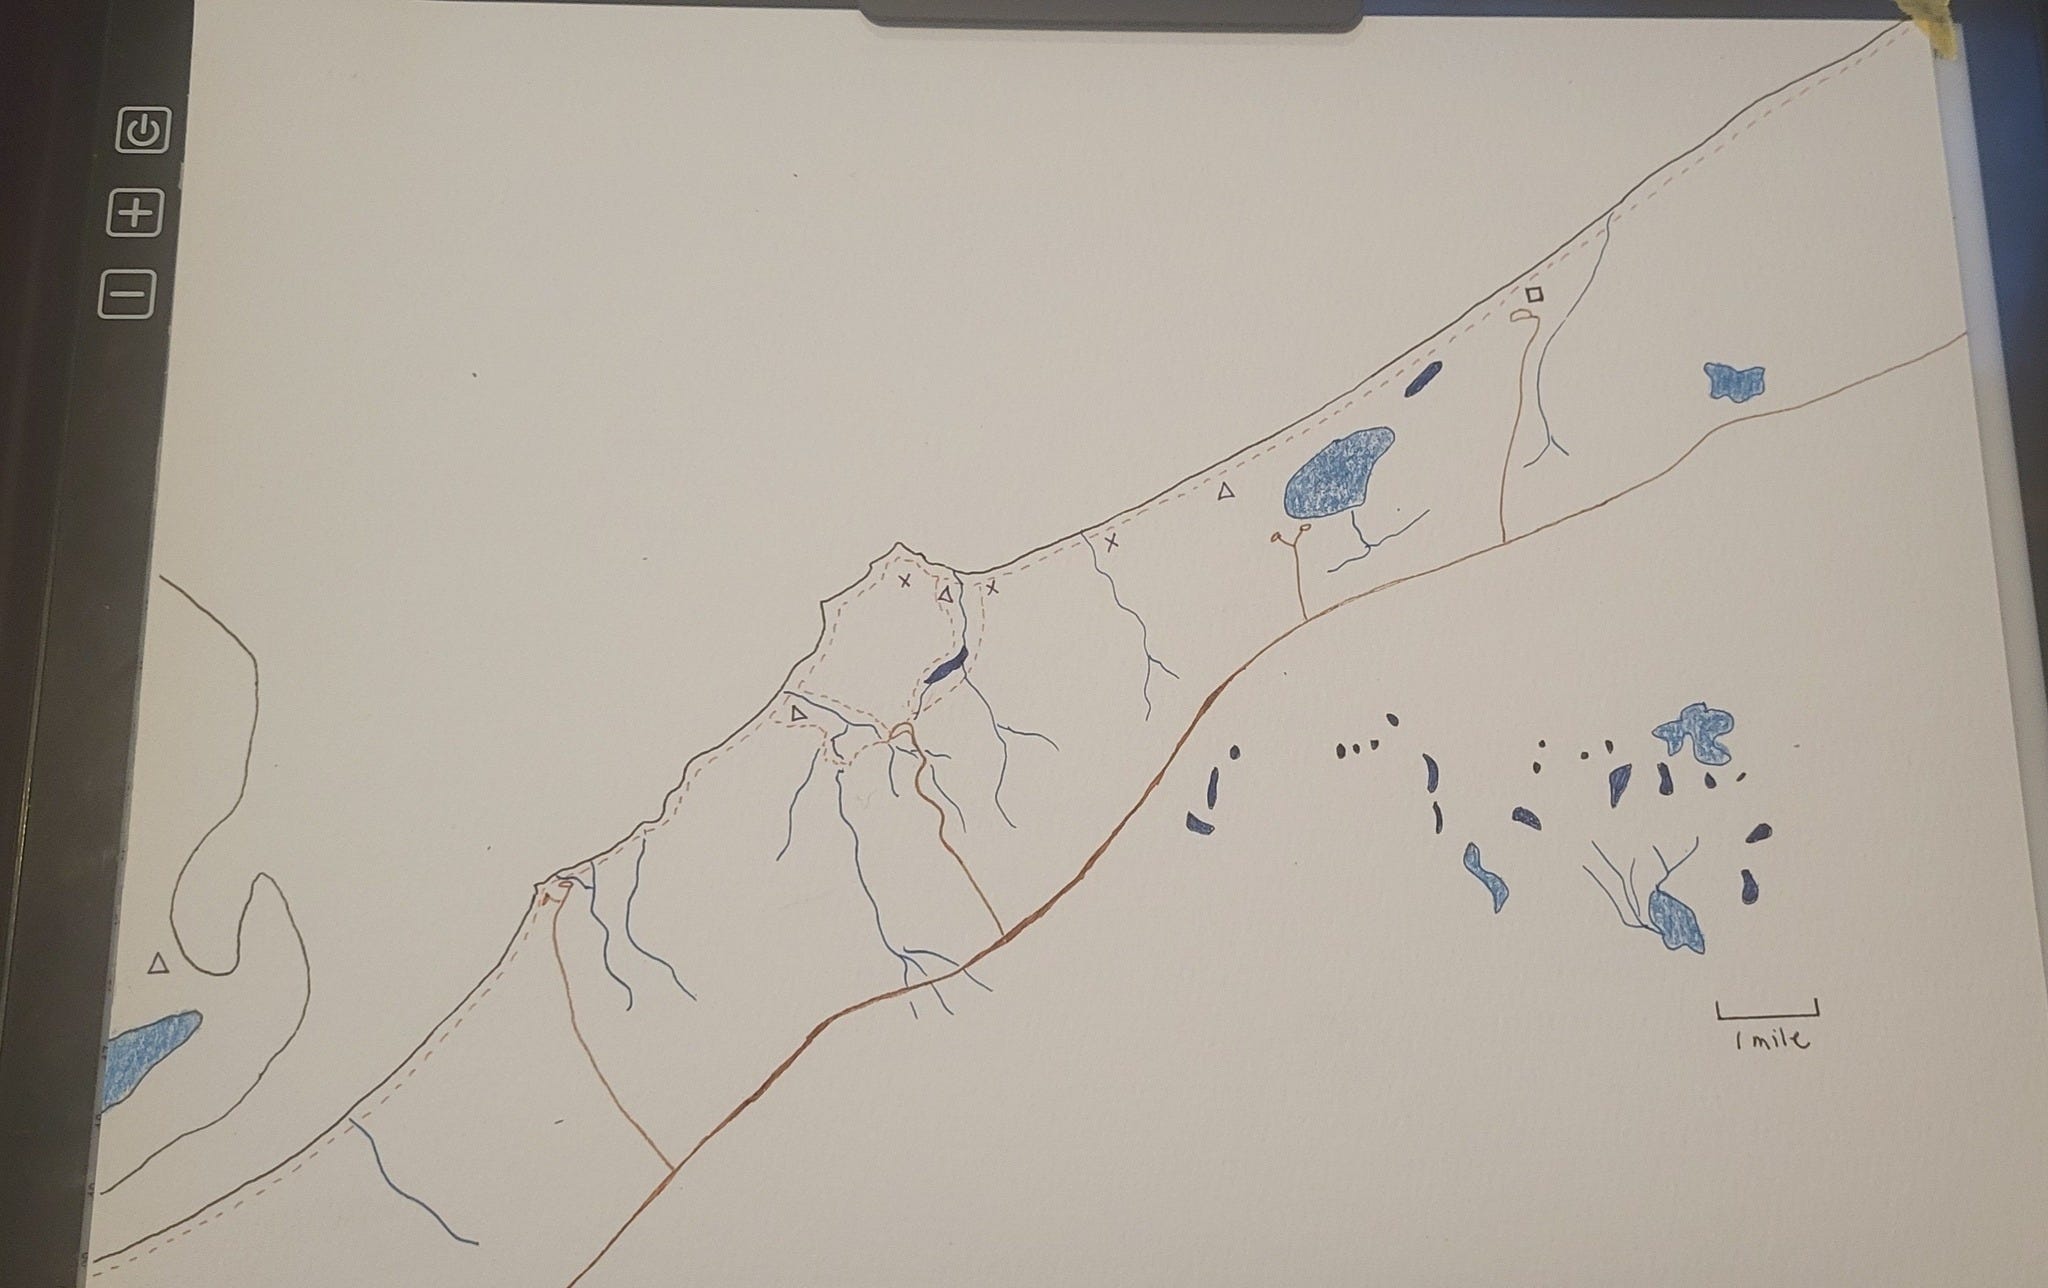
I had one plan for how I’d approach this map. Then I started doing things on “autopilot” and so I used a different method than I originally intended. I’m still happy with the results.
2. Arrange and Edit to Make the Whole Work
How to arrange things on a map is a big part of creating handmade maps. You need to consider how the map outline, key features, labels, compass points, titles, and other elements all work together on the page. Much like writing, my first draft is about getting things out on the paper. Then, in subsequent drafts, I work on arranging them on the page so that they are clear as individual items but also work cohesively as part of the whole. I’m really interested in the interplay between the micro and macro during the mapmaking process.
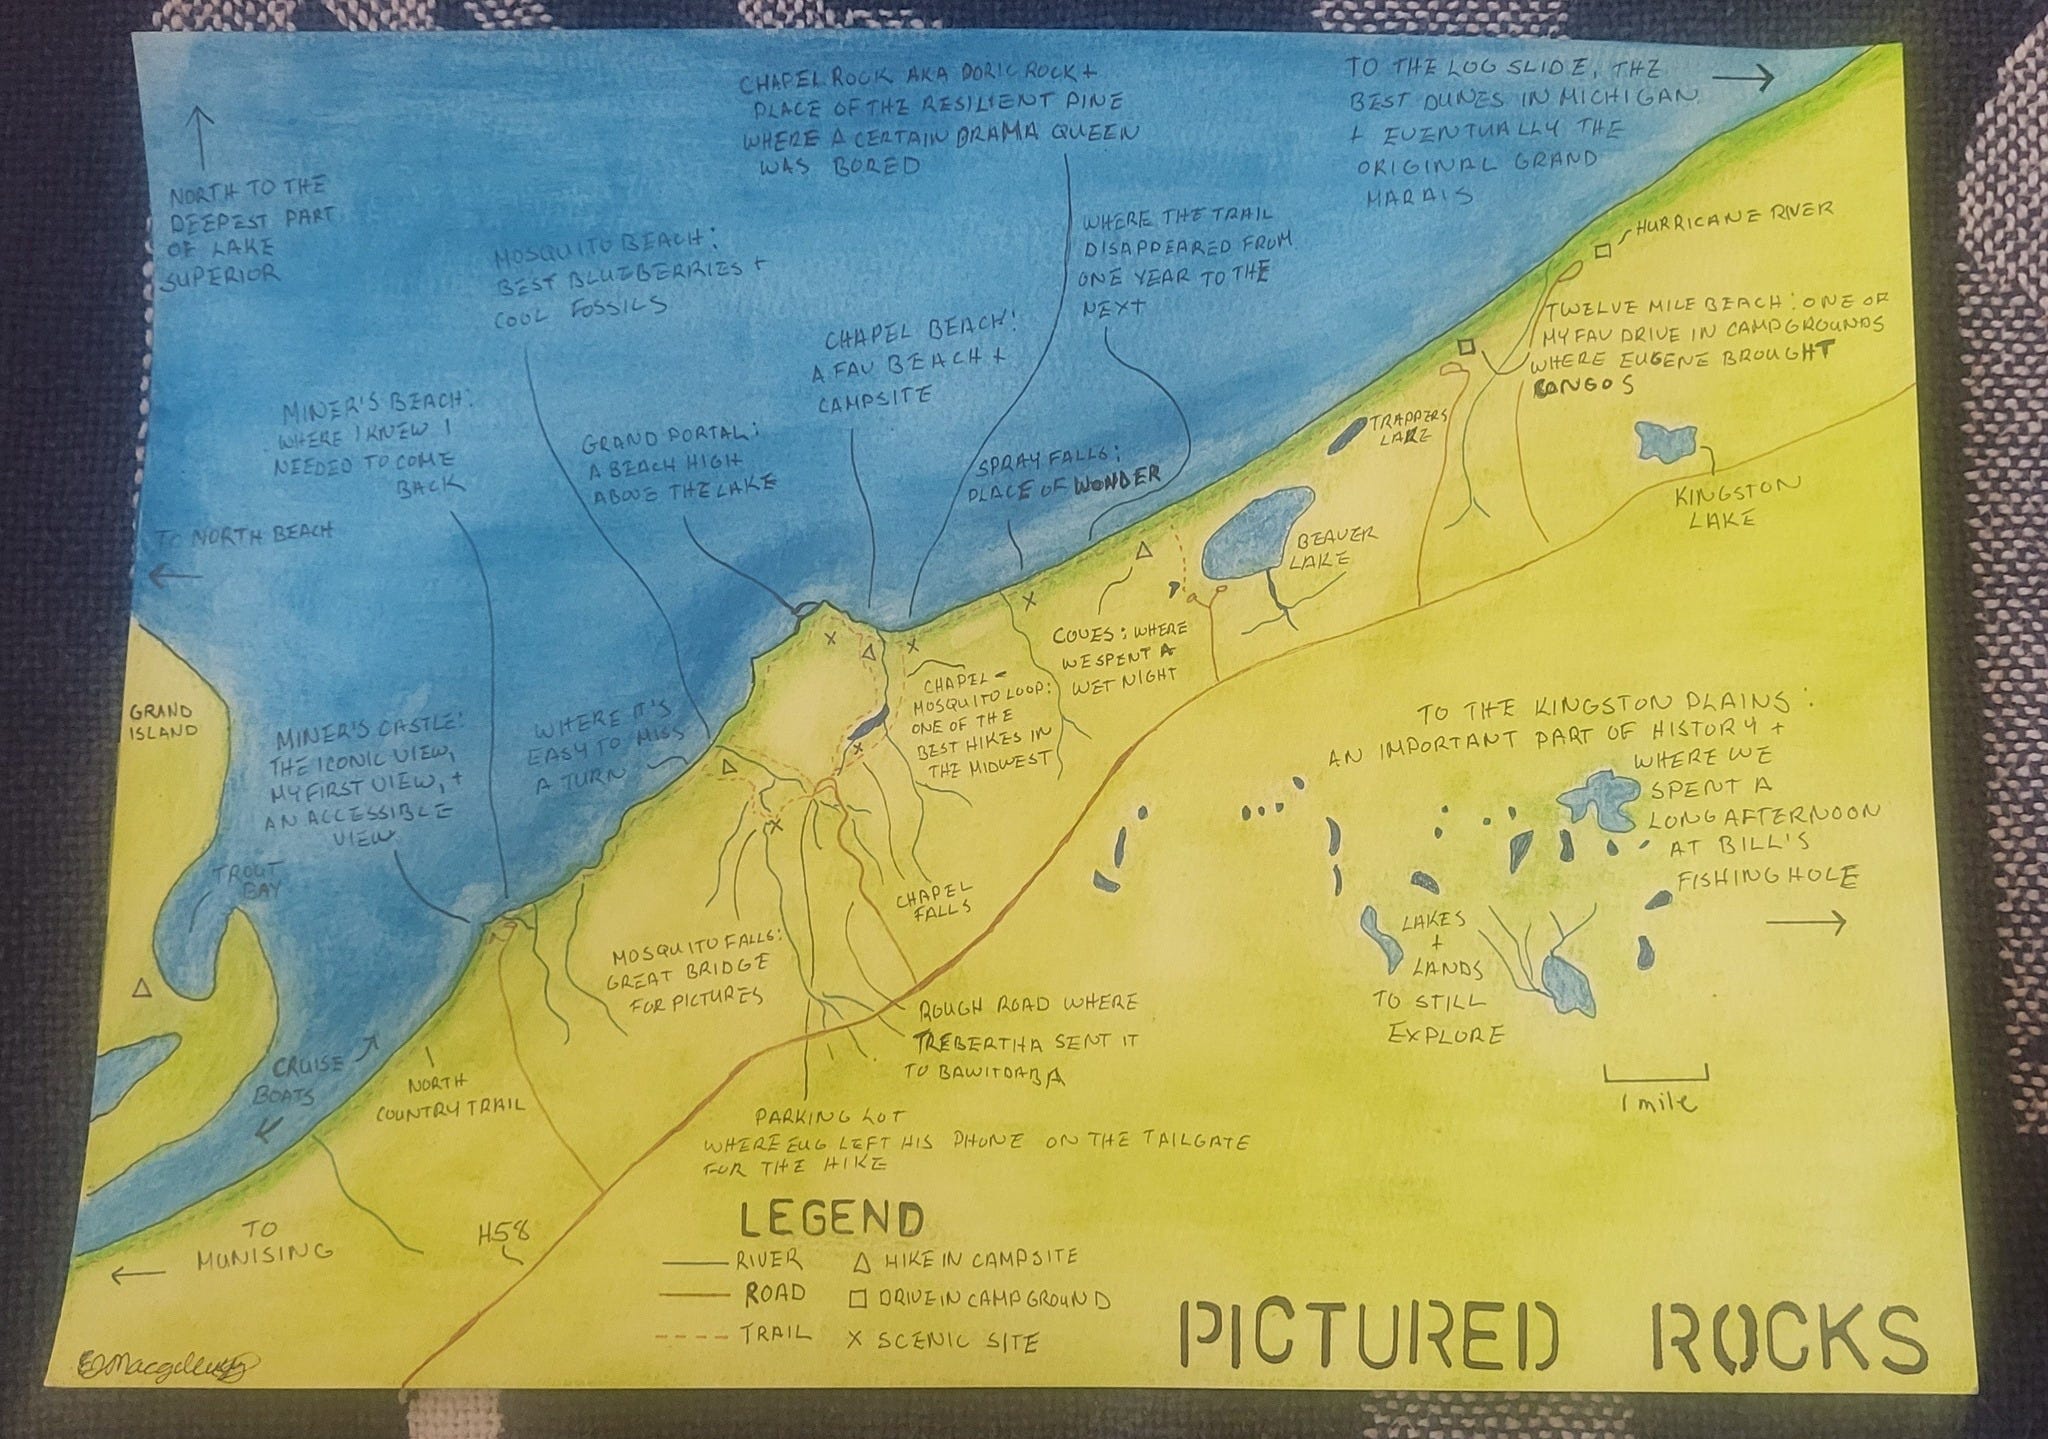
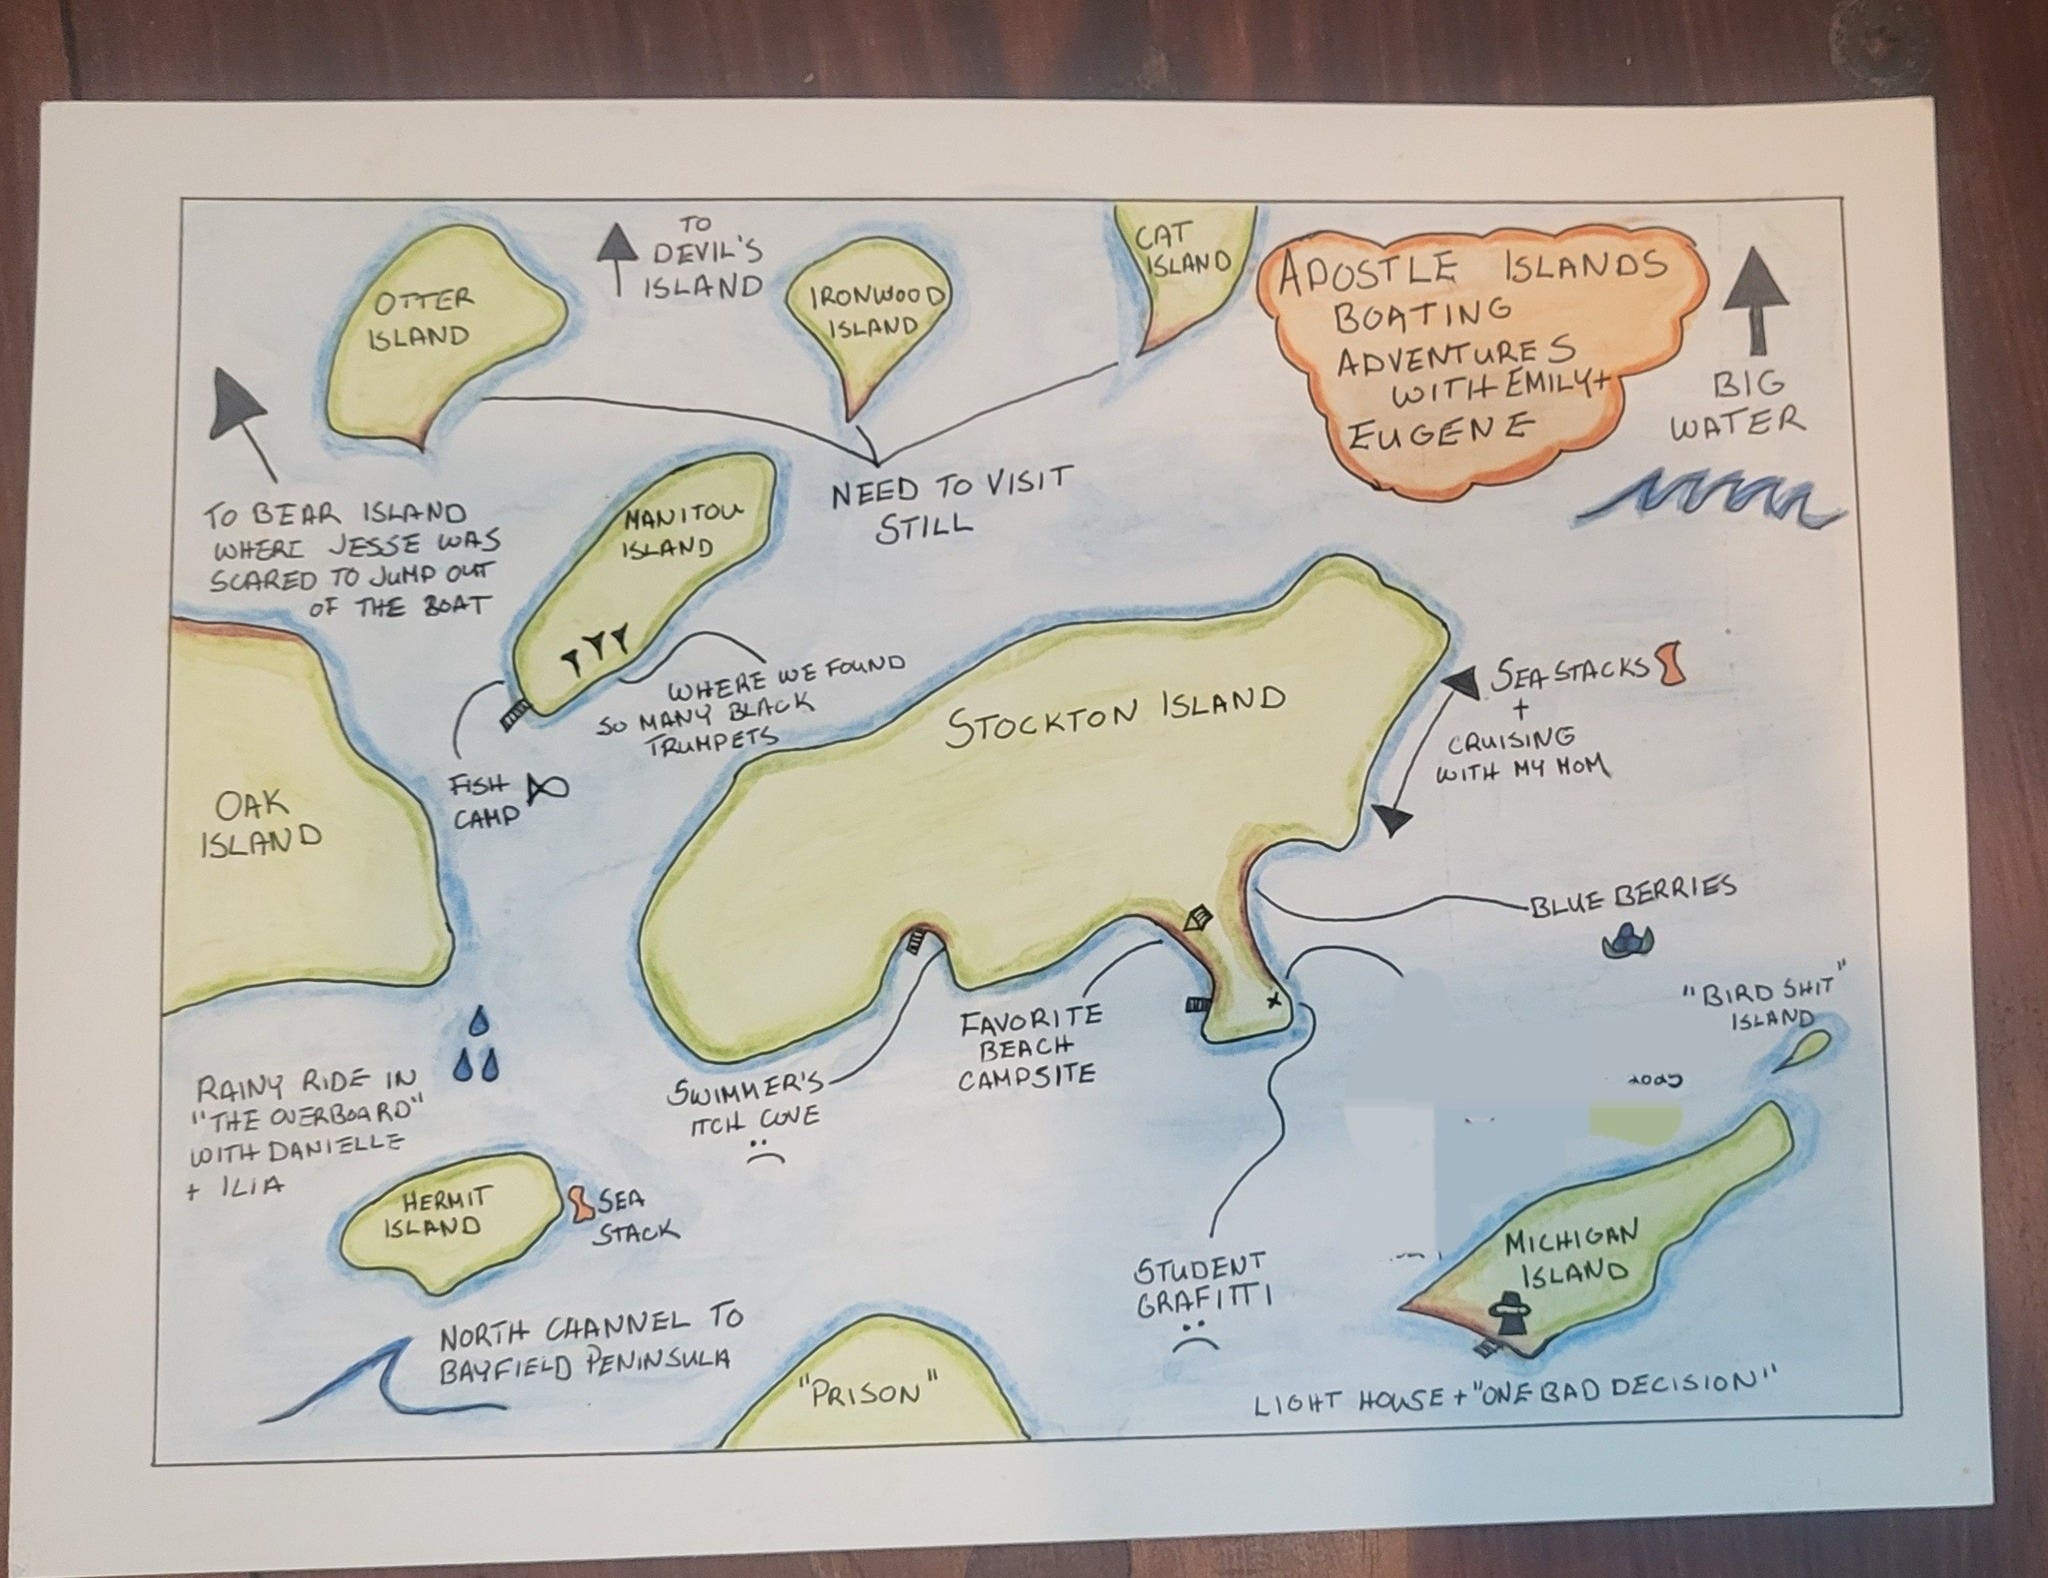
Placement is an important part of map making. I’m happy with how I handled a lot of the aspects of placement of this maps. But there are definitely things I’d change if I do another version. This map was show in process above.
3. Layer to Create Stories
I’ve also been reflecting on how, while part of mapmaking is about the arrangement on the page, you are also creating layers within a two-dimensional object. There are material layers to the process: tracing the map, then taking the original traced draft and editing as much as needed before finally tracing it onto your final medium (for me, usually watercolor paper). Through this process, you are also layering meanings. There’s a layered interplay between your experience at a place, how that place is shown on the map, and how you label and/or represent your experience on the map to tell a larger story.
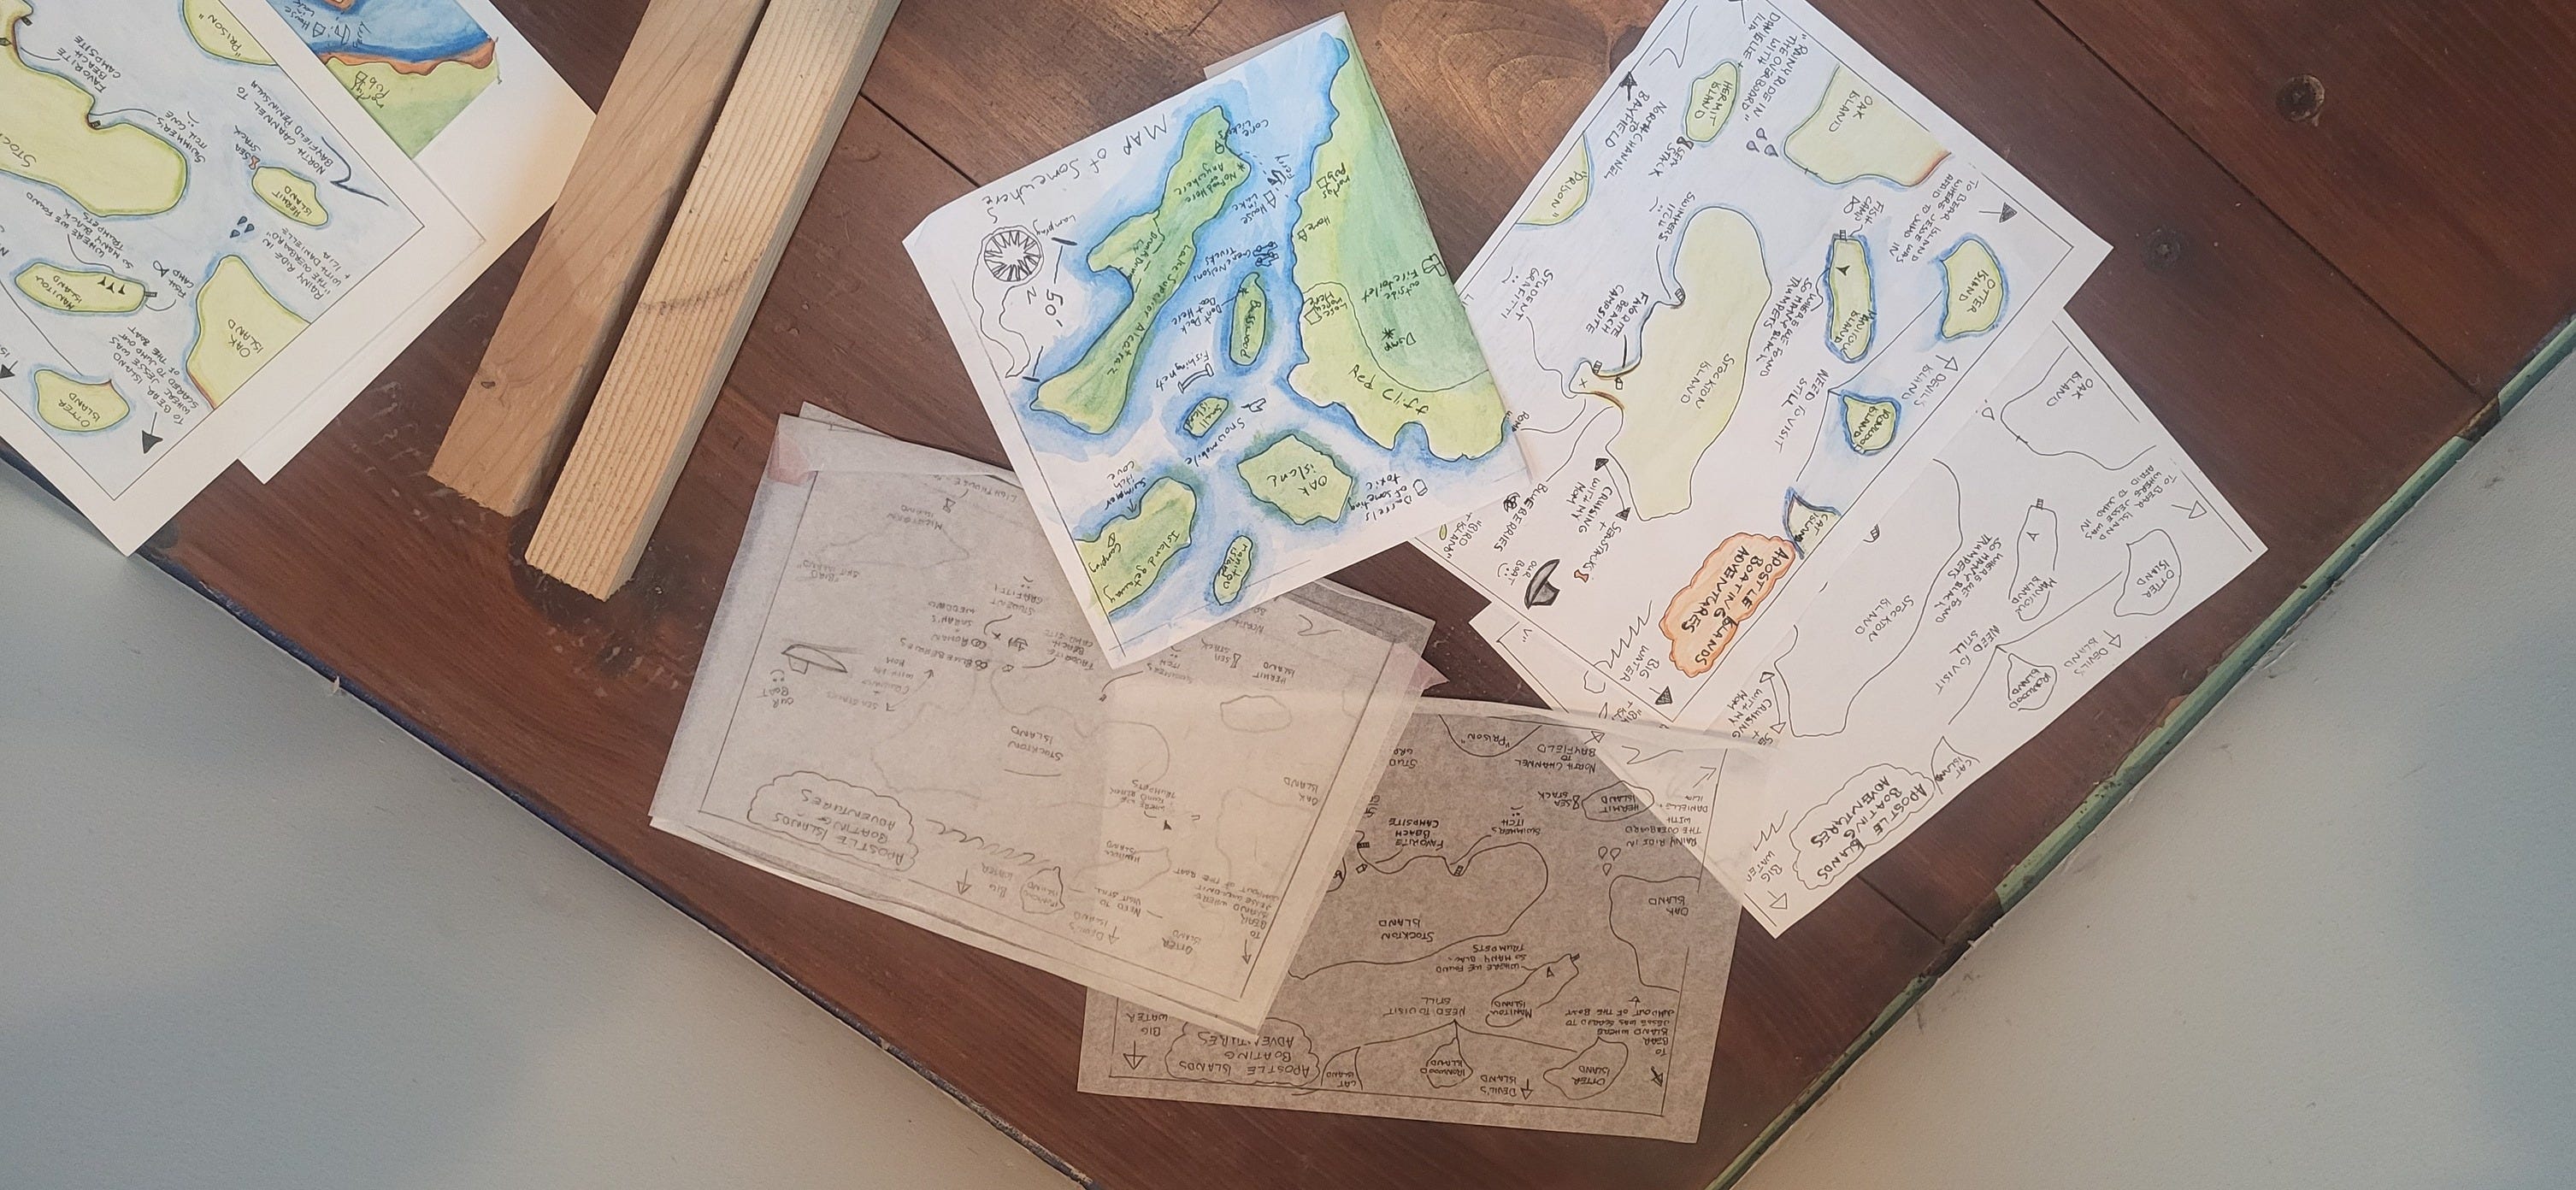
Some of the layers involved with making mine and Eugene’s first maps.
4. Go With the Flow and Learn To Work With Mistakes
Drafting is an integral part of the mapmaking process. But eventually, it’s time to create the final version. And sometimes, when you are drawing or writing with ink or coloring with a pencil or painting with watercolors, your hand makes a movement that your mind perceives as an error. Sometimes, this happens when your mind wanders for a moment. Sometimes, it even happens when you are fully focused on the moment. Now, you need to face the mistake, accept it, and decide how best to work with it. Maybe you can adjust it to mask it or incorporate it. Perhaps you’re happy with the results. Or maybe it is still visible despite your best attempts. Or maybe you realize partway through a final draft that there was a better way to approach something that could have led to a neater or more stylistic appearance.
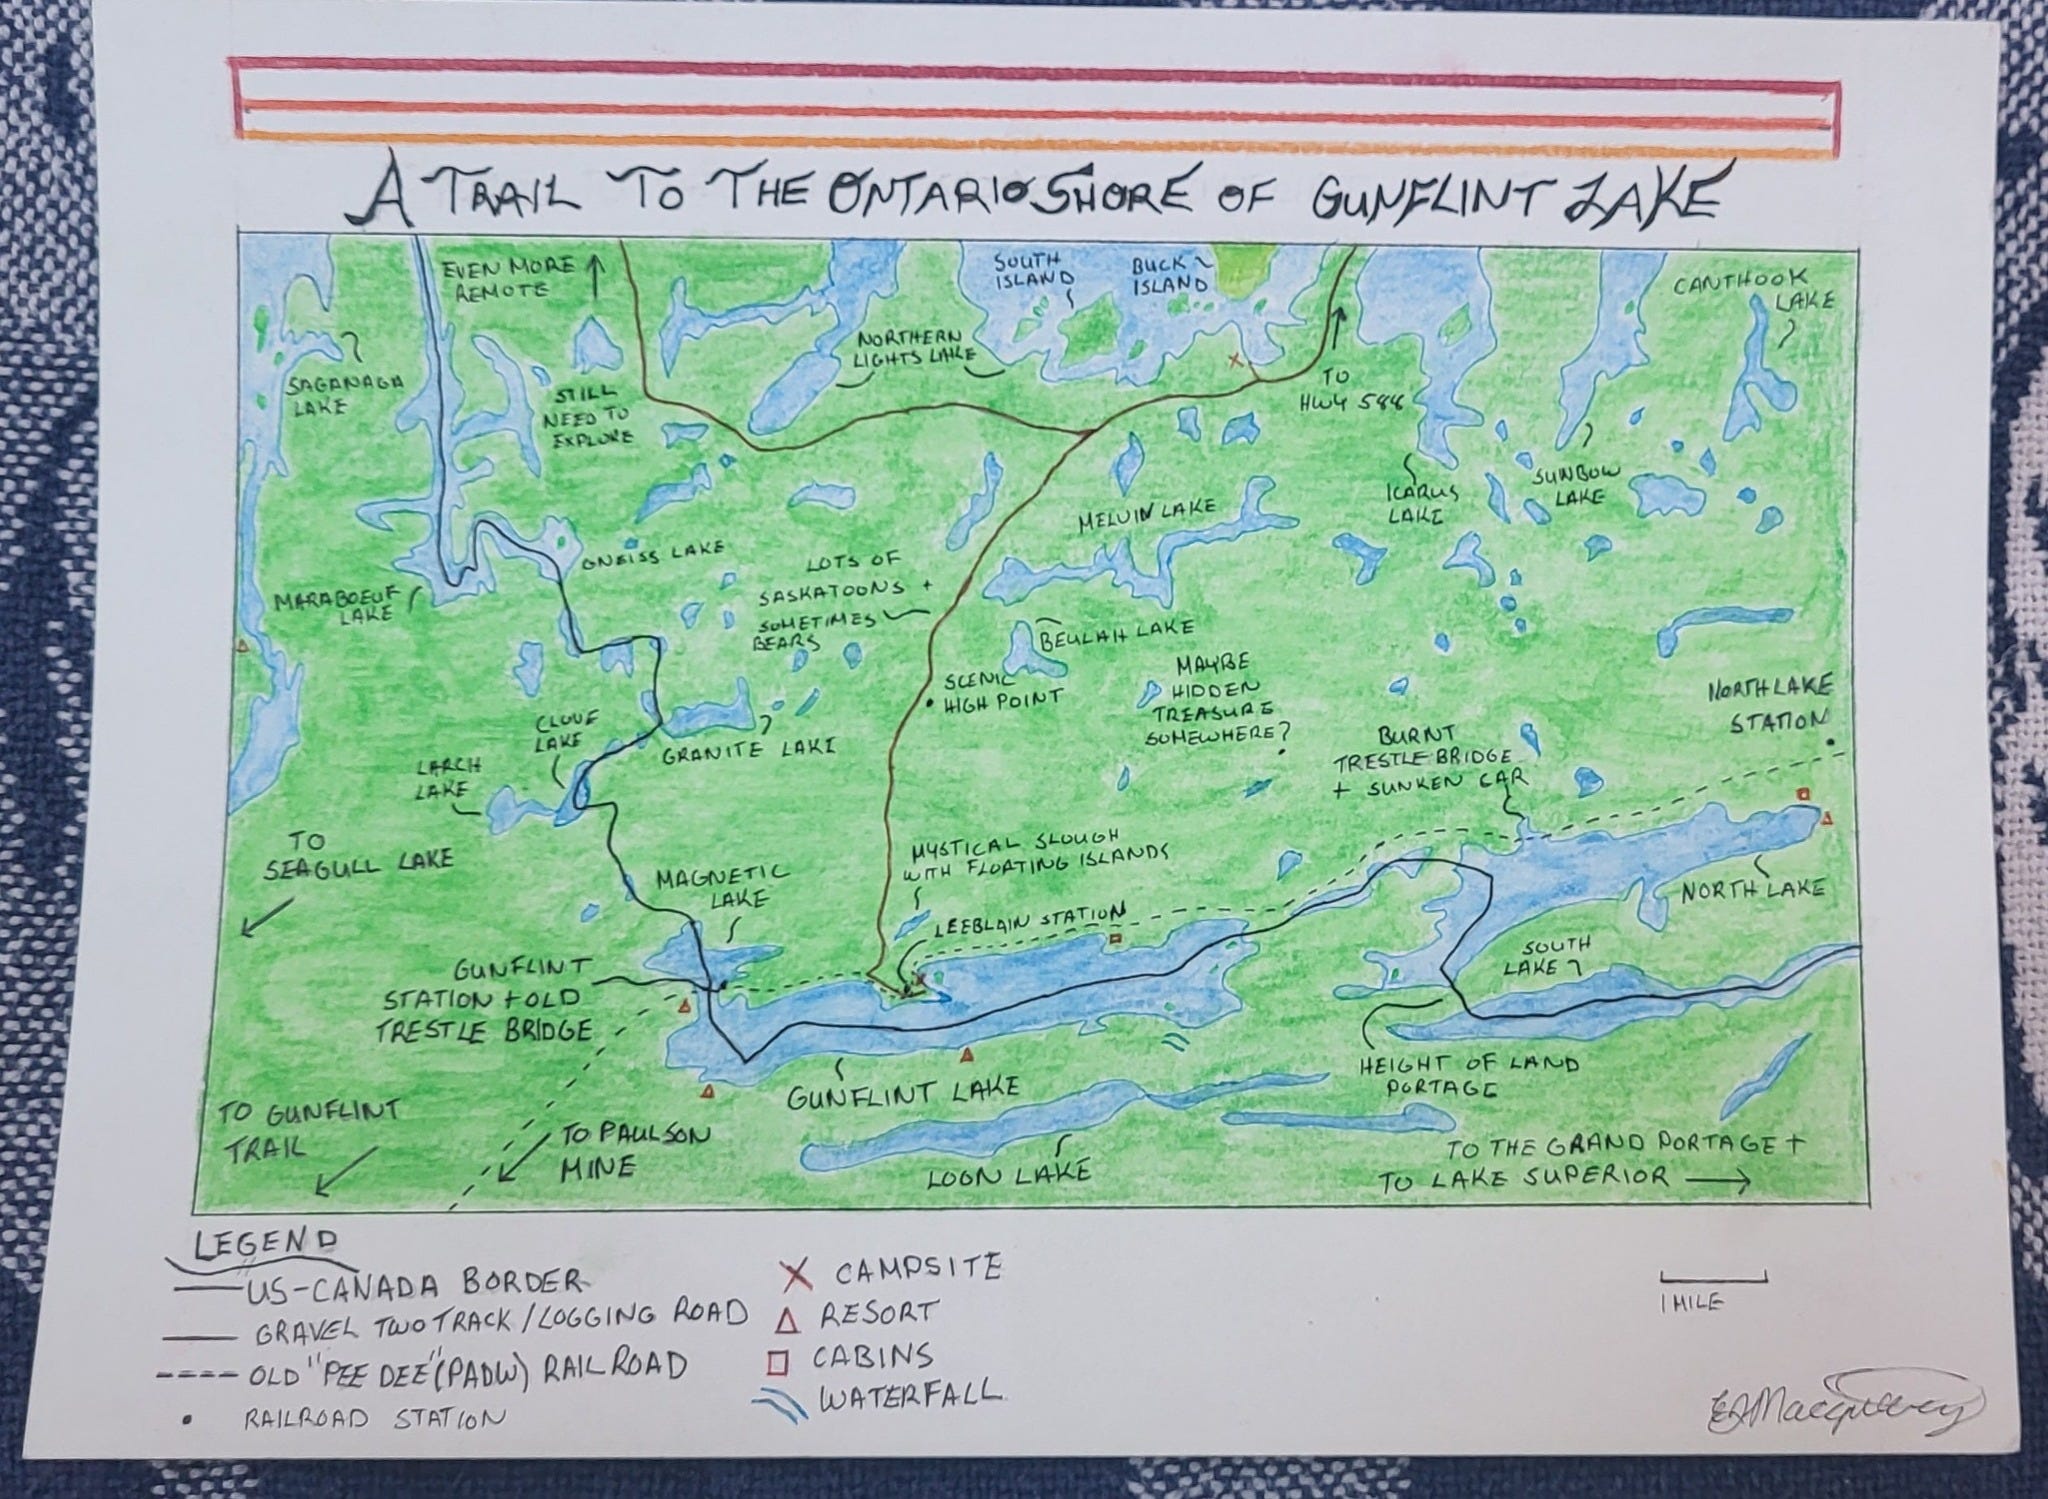
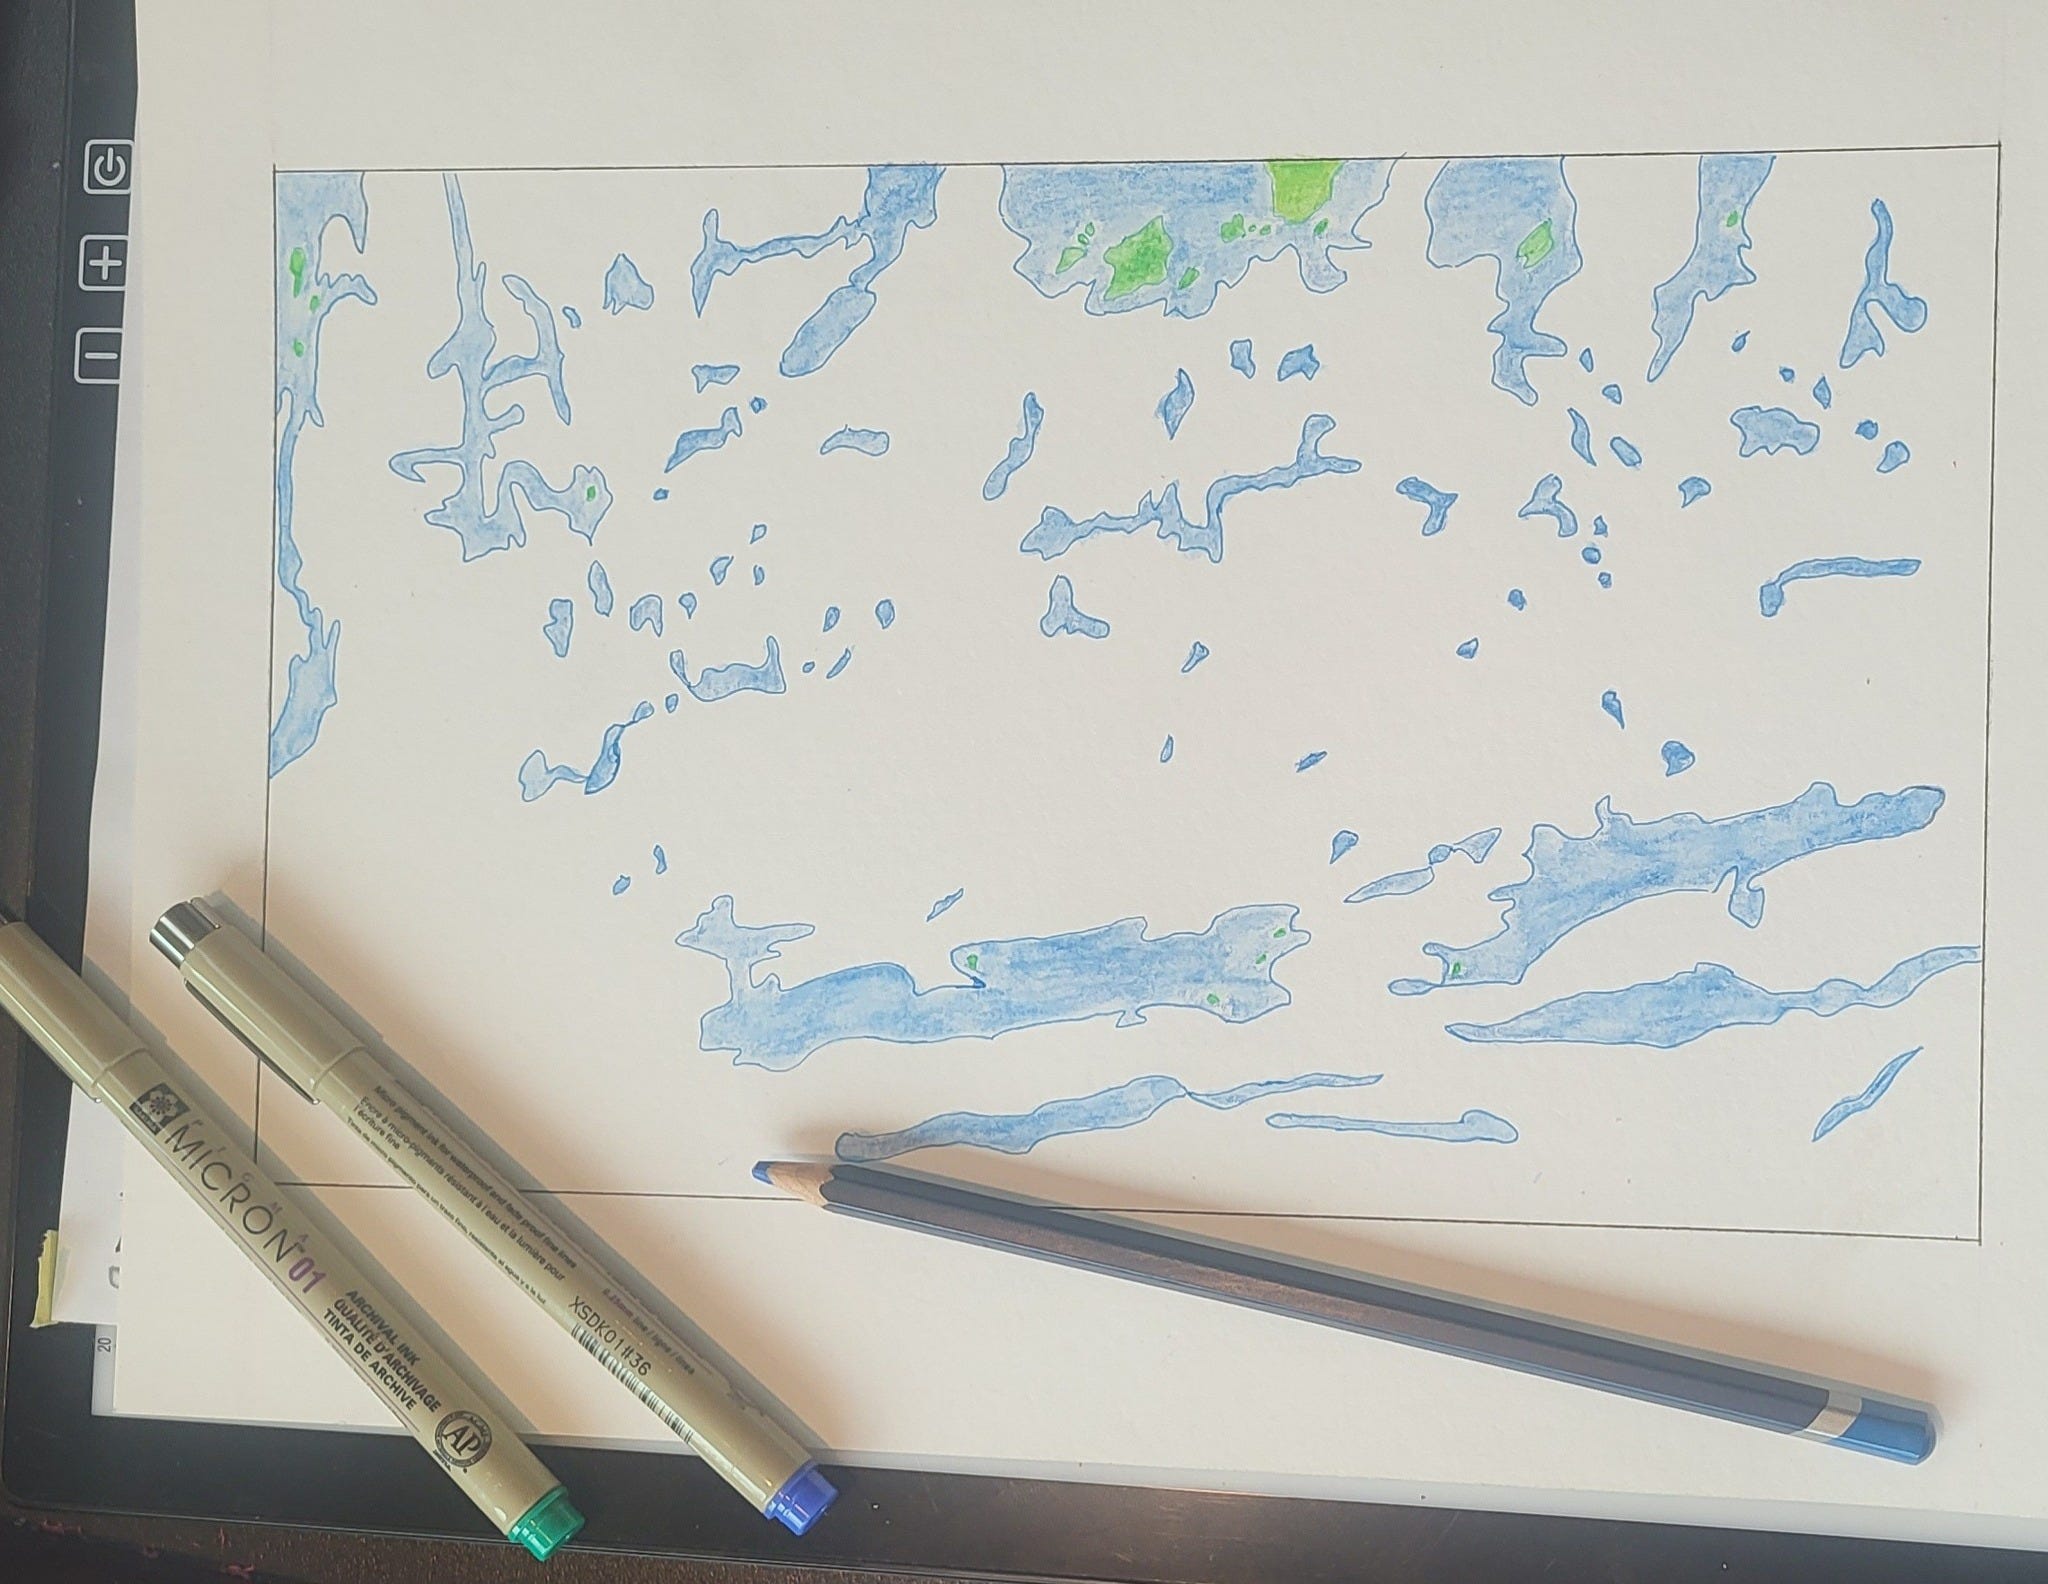
A map were I experimented with a new technique. This map was shown in process above.
In these moments, rather than throwing away the hours of effort I’ve spent, I have to learn to accept my mistake and go with the flow to make the best of it in some way. Maybe the map will become experimental, and I will try new techniques. Maybe I use the map as a practice to learn to accept, appreciate, and love something, even when the final product is different than I envisioned. Each map is an opportunity to learn to accept and cherish something, including its imperfections.


5. Effort Spent Today Can Pay Off In the Future
Sometimes, all the drafts and layers of the process seem tedious. And I thought, ' What will I do with all these drafts?' But in true creator-hoarder fashion, I stuffed them away. Then, a few nights ago, I went to a zine-making workshop, and I realized the drafts are perfect for zine-making. It turns out that the drafts and copies I thought I might never use again have been helpful for a new creative pursuit.


I’m excited to continue experimenting with making maps!
Do you have questions about making maps? Have you ever made a map? What did you learn?
Do you have a craft or hobby that teaches you lessons about life? What did you learn?
Please feel free to comment and share below!